ABF: Managing Projects
Contents
Browse and create projects
You can get list of all projects which you have access to in the "Projects" tab of the main menu of ABF.
At the same page you can initiate creation of a new project by clicking on the "New project" button. You can also create several projects at once on the basis of SRPM packages by clicking on the "Mass import" button.
Creating a new project from scratch
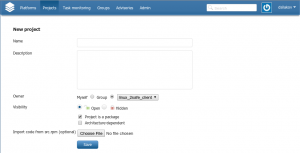
After you click on the "New project" button, you will be provided with a form where you should specify project name and description, specify project owner (you can create a project either in your personal platform or in any group where you have enough privileges).
At the same page, one should specify project visibility (will the project be public or private) and specify if the project will stand for a package (that is, if this is a project aimed to create a package for some repository. Optionally, you can specify SRPM package whose content will be imported to Git repository of the newly created project.
If you don't specify SRPM package, an empty Git repository wil be created for the project. You will have to populate this repository with data manually.
Note: You can also create a new project from SRPM package by means of ABF Console Client.
Cloning an existing project
You can create a project by cloning an already existing project to another group or platform or to a project with different name.
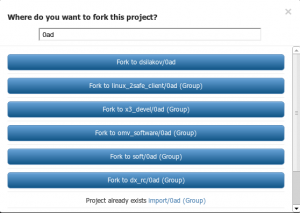
In order to do this, you should go to the page of the project to be cloned and press the "Fork" button.
In the window appeared, you should specify the name of a new project (by default, the name of original project is used) and press one of the "Fork to ..." buttons. A separate button will be displayed for every group to which you are able to clone the project (that is, for which you have necessary permissions). If some group already contains a project with the same name, you will see a corresponding message instead of the button. Once you change the name of the new project, ABF automatically rescans all the groups and either removes the message and displays the "Fork" button or vice versa - replaces button with a warning message if a project with the new name already exists.
Note: You can also clone a project by means of ABF Console Client.
Mass creation of projects on the basis of SRPM packages
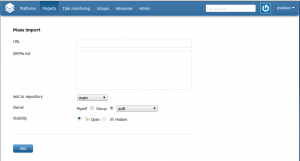
You can simultaneously import a set of SRPM packages and automatically create projects on their basis. SRPMs should be placed to some place in the Internet which will be accessible by ABF (by means of HTTP or FTP protocols). In the "Mass import" window one should specify URL to a remote folder with SRPM packages and (optionally) a list of packages to be imported. For example, if you put SRPM packages to http://mysite.ru site into the /myrepo/packages folder, then you should specify http://mysite.ru/myrepo/packages as URL.
If you leave list of SRPMs empty, then ABF will import all packages located at the specified URL (given that the server allows to get folder listing).
In the mass import window you can also specify a target repository to which the newly imported projects should be assigned, specify projects owner and their visibility.
For every SRPM package, ABF will create a project with a name corresponding to the name of SRPM. Package content will be pushed to Git repository of the new project. If during the import you choose target repository which has a Git branch associated with it (for example, projects for the rosa2012.1 platform are built by default using the rosa2012.1 branch), then a branch with such a name will be also created in the new Git repository and package content will be pushed to this branch, as well.
Note: Remember that to perform a mass import of SRPMs, you should place it to some place accessible by ABF through the network. To import local SRPM pakcages from your machine, you can use ABF Console Client].
Project settings
To configure project, you should first go to its page. This can be done by switching to the "Projects" section of the ABF main menu and clicking to the project name, or by finding a project using Search. On the project page, choose the "Settings" item in the second-level menu.
In the left part of the settings window the following subsections are available:
Settings
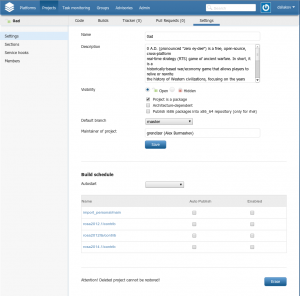
General project settings:
- name
- description
- visibility
- default branch
- maintainer
In the "Build schedule" section one can setup an automatic regular project build. To do this, please choose build periodicity in the "Autostart" combobox and choose target repositories in the table below.
"Erase" button in the right bottom corner can be used to delete the project completely. Use this button with safety - after a project is erased, it cannot be restored.
Sections
Here you can enable/disable Issue Tracker and Wiki for the project.
Service hooks
Here you can setup notifications for external services (web pages through HTTP, IRC channels or Jabber) so ABF will notify them about different project events.
Members
In this section you can add project members and manage their permissions. Note that user permissions are inherited from group permissions - that is, if a project is owned by some group and some user has Writer permissions in this group, then that user will automatically get Writer permissions for all projects of that group.


