How to work with helpdesk
In order to work with helpdesk.rosalab.ru, you should first create an account at support.rosalab.ru
Then you can go helpdesk.rosalab.ru.
Enter your Login and Password. If you have lost your password, follow the Forgot your password link at the bottom of the form.
By default, UI of the helpdesk site is in English. If you want to switch to Russian, follow the Settings link in the upper-right corner. In the form appeared, choose Russian in the Select Language and then press Update.
In the upper-left corner go to the Assistance and click on the Tickets. You will see a list of all requests.
At the top of the form, there are three buttons; click on the one marked with "+" to add a new request.
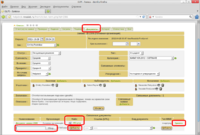
A new request form will be opened.
In the Actors section set you name.
At the right side, in the Category (class) section open a drop-down list and select issue category to which your request belongs.
In the Assigned section please only choose RosalabFirstLevel.
Now check the following fields:
- Status - should be set to New
- Urgency - should be set to Medium
- Impact - should be set to Medium
- Priority - should be set to Medium
- Request source - should be set to Helpdesk
Now in the Title provide a short summary of your request.
In the Description section please provide a detailed description.
In the File section you can attach screenshots or text files (the size of every file is limited to 2 Mb).
When you have filled and checked all the forms, press Add. A new request will be created.
In order to see all your requests, press Home in the upper-left corner. You will see a list of all requests filed by you.
The list of tickets contains the following data:
- ID: - request numeric identifier
- Actor - your personal information
- Associated elements - usually unset or set to Commons
- Description - Link to your ticket with description
You can view your request by clicking url in the Description. In the Documents section there is a File subsection at the bottom with a list of files attached to your request. You can add more files to existing requests.
In order to add a new file, press Choose, select a file and press Add.
In order to remove the file, press Remove at the left of its name.


