Difference between revisions of "ABF Getting Started"
(more English screenshots) |
m (Minor fixes for typo/grammar/untranslated words) |
||
| Line 12: | Line 12: | ||
In ABF, '''project''' stands for a union of software source code, documentation and other artifacts accompanied by meta-information necessary to build and distribute the software product as a package. | In ABF, '''project''' stands for a union of software source code, documentation and other artifacts accompanied by meta-information necessary to build and distribute the software product as a package. | ||
| − | == Creating new project == | + | == Creating a new project == |
Go to the ''Projects'' page and press the ''New Project'' button (one can also create a new project just pressing the ''New Project'' button on the main page). | Go to the ''Projects'' page and press the ''New Project'' button (one can also create a new project just pressing the ''New Project'' button on the main page). | ||
| Line 31: | Line 31: | ||
Now press the 'Save' button and your new project will be created. Source code from your SRPM package will be available in ABF git repository in the ''import'' branch. | Now press the 'Save' button and your new project will be created. Source code from your SRPM package will be available in ABF git repository in the ''import'' branch. | ||
| − | == | + | == Forking an existing project == |
| − | One can create a clone of a project that already exists in the system by forking it. | + | One can create a clone of a project that already exists in the system by forking it. (Note that different users/groups can have a project with the same name). |
| − | In order to | + | In order to create a fork, look for the project name using ABF web interface: |
[[File:ABF_Search.png|thumb|none]] | [[File:ABF_Search.png|thumb|none]] | ||
| Line 44: | Line 44: | ||
In order to create a project fork in ABF, press the "Fork" button. ABF will ask for confirmation and after you press 'OK' you will obtain a completely independent copy of the project, so you will be able to modify it as you wish and to build it inside your own repository. | In order to create a project fork in ABF, press the "Fork" button. ABF will ask for confirmation and after you press 'OK' you will obtain a completely independent copy of the project, so you will be able to modify it as you wish and to build it inside your own repository. | ||
| − | Now you can see | + | Now you can see your fork of the project in the ''Projects'' section which contains all projects of your own and projects where you are participating. |
| − | == Building | + | == Building projects == |
| − | In order to transform project source code into a package that can be published | + | In order to transform project source code into a package that can be published to the repository, you should ''Build'' the project. |
Go to the ''Projects'' section and choose the project you want to build. | Go to the ''Projects'' section and choose the project you want to build. | ||
| Line 60: | Line 60: | ||
For the new build you should specify the following parameters: | For the new build you should specify the following parameters: | ||
| − | *'''Version''' — | + | *'''Version''' — a list of available versions which is formed from the following values: |
| − | *'''Platform''' — if you are going to publish package only in your own repository, then you can build the project for multiple platforms - e.g., for RosaNPP and ROSA 2012 LTS; | + | *# last commit of every branch in the git repository (represented as ''latest_<branch_name>'') |
| + | *# all tags of the git repository; | ||
| + | *'''Platform''' — a set of repositories; if you are going to publish package only in your own repository, then you can build the project for multiple platforms - e.g., for RosaNPP and ROSA 2012 LTS; | ||
*'''Update type''' — indicates importance of project update for end users. Can be one of ''security'', ''bugfix'', ''enhancement'', ''recommended'' and ''newpackage''; | *'''Update type''' — indicates importance of project update for end users. Can be one of ''security'', ''bugfix'', ''enhancement'', ''recommended'' and ''newpackage''; | ||
*'''Build with all the required packages''' - choose this if you also want to rebuild all packages that depend on the current one. Using this possibility allows to guarantee that the repository is consistent and can be completely rebuilt at any time; | *'''Build with all the required packages''' - choose this if you also want to rebuild all packages that depend on the current one. Using this possibility allows to guarantee that the repository is consistent and can be completely rebuilt at any time; | ||
| Line 83: | Line 85: | ||
*'''Build complete''' — the package has been built successfully; | *'''Build complete''' — the package has been built successfully; | ||
*'''Build is being published''' — the package is built and waiting in the publishing queue. | *'''Build is being published''' — the package is built and waiting in the publishing queue. | ||
| − | *'''Publishing error''' — the | + | *'''Publishing error''' — the package has been built but some error occurred during its publishing. You can try to publish the package later. |
*'''Build has been published''' — the package has been successfully published in the repository. | *'''Build has been published''' — the package has been successfully published in the repository. | ||
| Line 91: | Line 93: | ||
[[File:ABF_Build_Status.png|thumb|none]] | [[File:ABF_Build_Status.png|thumb|none]] | ||
| − | Detailed task information will be displayed such as user who | + | Detailed task information will be displayed such as user who launched the build, build parameters, packages, current status and so on. |
If the build fails or the package publishing fails then '''Container path''' string will contain address of a container with the complete build log. All packages managed to be built successfully are also available in that container. | If the build fails or the package publishing fails then '''Container path''' string will contain address of a container with the complete build log. All packages managed to be built successfully are also available in that container. | ||
Revision as of 15:19, 16 April 2012
Contents
Terms and Definitions
- ABF — a distributed environment to build distributions, supporting all steps from managing source code to creating ISO images.
- Project — software source code, documentation and other artifacts accompanied by meta-information necessary to build and distribute the software product as a package.
- Group — users working on the same project. ABF allows to manage access privileges on both per-user and per-group levels.
- Platform — a group of repositories to be handled as a single entity. Such groupings are useful for creating different products from the same set of packages.
- Repository — a set of packages grouped together according to certain criteria: main packages, auxiliary packages, non-free software, etc.
- Product — ISO image of a distribution built on the basis of some platform.
Projects
In ABF, project stands for a union of software source code, documentation and other artifacts accompanied by meta-information necessary to build and distribute the software product as a package.
Creating a new project
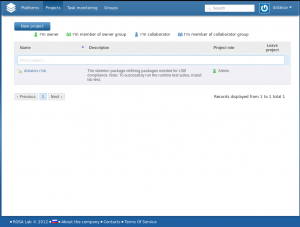
Go to the Projects page and press the New Project button (one can also create a new project just pressing the New Project button on the main page).
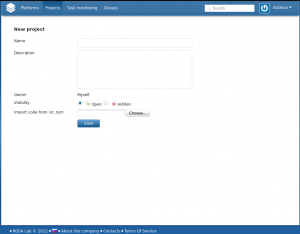
The following page will appear:
Please fill the following values for your project:
- Name — project name (without space characters);
- Description — short project description (optional);
- Owner — choose who will own the project - you by yourself or some group;
- Note: you can create a project owned by group only if you are creator of the group or its administrator. If you are not creator or administrator of any group, there will be no choise for you in this field
- Visibility — if the project should be public or private (visible only for users explicitly allowed to access it);
On this page you can also import SRPM package for you project - just click the 'Choose' button and choose the file to import.
Now press the 'Save' button and your new project will be created. Source code from your SRPM package will be available in ABF git repository in the import branch.
Forking an existing project
One can create a clone of a project that already exists in the system by forking it. (Note that different users/groups can have a project with the same name).
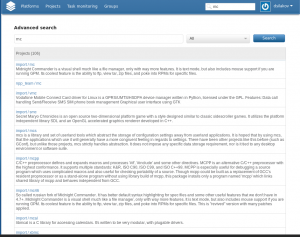
In order to create a fork, look for the project name using ABF web interface:
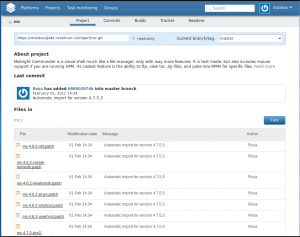
Choose the project you want to fork and click on its name. You will see a page with project description.
In order to clone the project source code, just use the git repository URL displayed under the main menu (if you are not project owner or developer, this URL will allow you to only checkout the source code, but not to commit your changes back).
In order to create a project fork in ABF, press the "Fork" button. ABF will ask for confirmation and after you press 'OK' you will obtain a completely independent copy of the project, so you will be able to modify it as you wish and to build it inside your own repository.
Now you can see your fork of the project in the Projects section which contains all projects of your own and projects where you are participating.
Building projects
In order to transform project source code into a package that can be published to the repository, you should Build the project.
Go to the Projects section and choose the project you want to build.
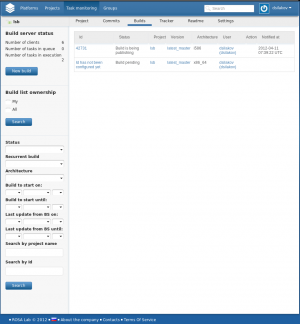
Click on its name and then go to the Builds section.
In order to build the project, press the New build button.
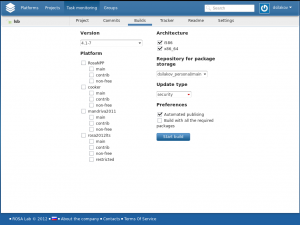
For the new build you should specify the following parameters:
- Version — a list of available versions which is formed from the following values:
- last commit of every branch in the git repository (represented as latest_<branch_name>)
- all tags of the git repository;
- Platform — a set of repositories; if you are going to publish package only in your own repository, then you can build the project for multiple platforms - e.g., for RosaNPP and ROSA 2012 LTS;
- Update type — indicates importance of project update for end users. Can be one of security, bugfix, enhancement, recommended and newpackage;
- Build with all the required packages - choose this if you also want to rebuild all packages that depend on the current one. Using this possibility allows to guarantee that the repository is consistent and can be completely rebuilt at any time;
- Architecture - target hardware architecture. Currently we have build bots for i586 and x86_64;
- Repository for package storage — repository where resulting package(s) will be publish if the build succeeds. In order to build package for repository of some platform, your project should be added there by platform administrator.
- Automated publishing - automatically publish the package in repository if the build succeeds. If this parameter is not set, then the package will be built but not published; but you may still publish it later.
When all values are set, press the Build button and the project build will be launched.
Monitoring builds
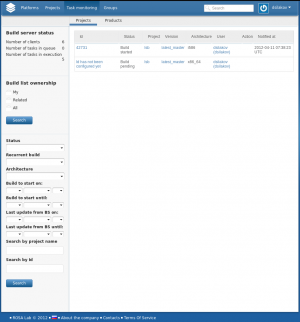
You can monitor the builds in the Task monitoring section.
This page displays all building projects which are accessible by you.
Possible build status values include:
- Build pending — the build is waiting in the queue;
- Build started — the build has been started;
- Build error — package build failed; take a look at build log for details;
- Build complete — the package has been built successfully;
- Build is being published — the package is built and waiting in the publishing queue.
- Publishing error — the package has been built but some error occurred during its publishing. You can try to publish the package later.
- Build has been published — the package has been successfully published in the repository.
You can use filters on this page to sort out projects according to certain criteria.
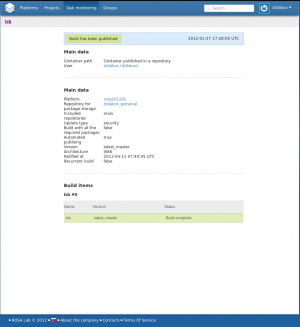
If you want to get detailed information about some task, just click on its ID:
Detailed task information will be displayed such as user who launched the build, build parameters, packages, current status and so on.
If the build fails or the package publishing fails then Container path string will contain address of a container with the complete build log. All packages managed to be built successfully are also available in that container.
Working with source code using Git
Source code for all projects is stored in the Git repository. To work with repository, you should know its URL which can be seen at the project page in ABF Web UI under the main menu.
The following Git commands will be useful for the basic repo management:
- Get the code:
git clone <repo_address>
- you will be asked for a password of your ABF account; in case when you are cloning a public project, you can just enter an empty password.
- Checkout particular branch:
git checkout <branch_name>
- Commit the changes:
git commit -a -m “commit_summary”
- Add all new files you have created locally to the project repository:
git add --all
- Push the changes to ABF:
git push
- you will be asked for a password of your ABF account; in order to push the changes to server, you should have appropriate permissions
- Get the latest code copy from the server:
git pull
error: Peer certificate cannot be authenticated with given CA certificates
then add 'env GIT_SSL_NO_VERIFY=true' before the command, e.g.:
env GIT_SSL_NO_VERIFY=true git clone
error: RPC failed; result=22, HTTP code = 411
then run 'git config http.postBuffer 524288000'
and run once again the command that led to this problem
These commands should be enough to start working with ABF.
