Difference between revisions of "ROSA Installation"
CaptainFlint (Talk | contribs) (Fixed mac version) |
CaptainFlint (Talk | contribs) |
||
| (4 intermediate revisions by 2 users not shown) | |||
| Line 5: | Line 5: | ||
* [[Installing Parallels Tools|Hints for Parallels users]] | * [[Installing Parallels Tools|Hints for Parallels users]] | ||
* [[Booting ROSA from iso file]] | * [[Booting ROSA from iso file]] | ||
| + | * [[Flash drive with several ROSA ISO images]] | ||
}} | }} | ||
| − | '''ROSA''' is an operating system aimed to be as | + | '''ROSA''' is an operating system aimed to be as close to users as possible. That's why its installation process is very simple: you should just download installation file, write it on some media (CD or flash), reboot the system and launch the installation wizard. To make working with the wizard even more easier, we have prepared this step-by-step guide. |
== Preparing bootable flash drive == | == Preparing bootable flash drive == | ||
| Line 15: | Line 16: | ||
===Graphical mode=== | ===Graphical mode=== | ||
To prepare a bootable drive in graphical mode, we recommend to use ROSA Image Writer. If you are running ROSA Dekstop you can simply install the '''rosa-imagewriter''' package from its repositories. For other systems the program is available by the following links: | To prepare a bootable drive in graphical mode, we recommend to use ROSA Image Writer. If you are running ROSA Dekstop you can simply install the '''rosa-imagewriter''' package from its repositories. For other systems the program is available by the following links: | ||
| − | + | {{ROSA ImageWriter}} | |
| − | + | ||
| − | + | ||
| − | + | ||
{{Note|Unmount flash device before writing to it; ROSA Image Writer will try to do this automatically, but may fail in some systems}} | {{Note|Unmount flash device before writing to it; ROSA Image Writer will try to do this automatically, but may fail in some systems}} | ||
Latest revision as of 14:44, 8 July 2015
This guide describes installation of ROSA 2012.1 Fresh but most of its parts equally apply to ROSA 2012 LTS, ROSA 2011, with only differences in appearance
Here we describe the most common way of ROSA installation - using iso image burnt to DVD or USB stick. For alternative ways of trying ROSA, you can refer to the following pages:
ROSA is an operating system aimed to be as close to users as possible. That's why its installation process is very simple: you should just download installation file, write it on some media (CD or flash), reboot the system and launch the installation wizard. To make working with the wizard even more easier, we have prepared this step-by-step guide.
Contents
Preparing bootable flash drive
If you want to prepare a bootable flash drive using ROSA ISO image, you can do this in either graphical or text mode.
Graphical mode
To prepare a bootable drive in graphical mode, we recommend to use ROSA Image Writer. If you are running ROSA Dekstop you can simply install the rosa-imagewriter package from its repositories. For other systems the program is available by the following links:
- for WindowsXP™, Windows7™ (4,3 Mb)
- for Linux 32-bit (5,2 Mb)
- for Linux 64-bit (5,1 Mb)
- for Mac OS X® (6,1 Mb)
Unmount flash device before writing to it; ROSA Image Writer will try to do this automatically, but may fail in some systems
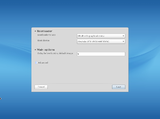
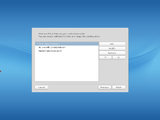
In the upper field select the image file by clicking the open file button; in Linux you may simply drag and drop the iso file from file manager into the application window. In the drop-down box at the bottom of the window select the device where the image should be written to. To write the image, press the Write button in the lower right corner.
Text mode
In order to prepare a bootable flash drive in text mode, use dd_rescue from root (install before dd_rescue package):
dd_rescue ROSA.iso /dev/sdb
Also you may use dd utility (available in Linux only) with bs=1MB option, such as:
dd if=ROSA.iso of=/dev/sdb bs=1MB
where ROSA.iso - is an iso image you have downloaded and /dev/sdb - is a path to flash drive device. You can know this device name by examining output of the following command:
df -h
Installing ROSA
- When the bootable flash drive is ready, reboot your machine and in the appeared menu choose "Install system". Installation wizard will appear.
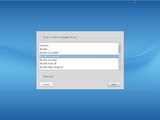
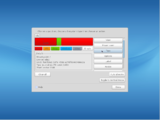
- First, you will see a disk partitioner window. Choose "Custom" and press "Next".
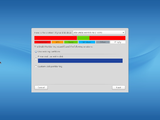
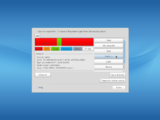
- Press the "Toggle to expert mode" button. Choose a partition for your Linux system.
Novice users are often confused by the disk partitioning. Unlike Windows where a single large partition is enough, Linux can require more complex partitioning in some situations. Though it is possible to install Linux on a single partition, as well, it is recommended to have at least separate swap and root partitions (the latter is designated as /). But how much space should every of this partitions occupy? There is no single solution for this, but below we'll provide you with recommended numbers for ROSA.
For the most purposes, two partitions are enough:
1. A root partition (/) for the core system - approx. 15 Gb. Choose either ext3 or ext4 type for this partition. Ext4 should be faster in some situations, though there are some aspects that are out of scope of this guide.
2. A swap space - often set to the size of your RAM.
You can also create a separate home partition where all your personal data (documents, photos, etc.) will be stored. This is not necessary; you may for example use Windows partitions for these purposes. If you don't create a separate partition then a special folder called 'home' will be created in the partition where the main part of the system is installed. In our example, we will use the default pasrtitioning.
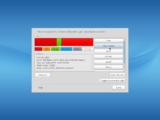
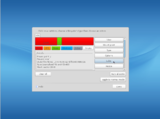
Now you should have two partitions.
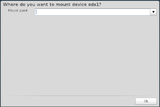
Press the "Mount point" button.
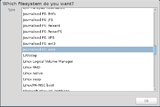
- Press "Type". choose the filesystem to be used (Ext4 is used by default).
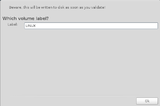
- For convenience, we recommend to assign a label to the ROSA partition. This will allow file managers to display meaningful name for that partition. Press "Label" and enter any label you want using Latin characters only.
NTFS notes
For more details see bug 302
Users who wish to manipulate the NTFS partitions from console or mc, should use the UUIDs:
- know your partitions UUIDs using the blkid utility
example of blkid output (from root)
/dev/sda1: UUID="8e51b8f5-d2c8-47cd-9313-bb10fade148d" TYPE="ext3"
/dev/sda2: UUID="acde421c-afaf-4c87-b3df-e858e18a6ab2" TYPE="ext3"
/dev/sda5: UUID="30c57adf-c634-40ca-b489-3e2fd0c3b1f4" TYPE="swap"
/dev/sda6: UUID="0ffbbb1f-4e4f-4867-809f-7dfe11598769" TYPE="ext3"
/dev/sdb1: UUID="4A5C879D5C878285" TYPE="ntfs"
/dev/sdb2: UUID="35dcede3-0c9a-4ea7-b35f-b2ef956696d3" TYPE="ext4"
/dev/sdb3: UUID="eecf597f-c738-4059-bd99-3310081f24f8" TYPE="reiserfs"
The 'TYPE="ntfs"' string contains the NTFS partition UUID.
- insert the UUID entry into /etc/fstab like in following example (do not forget to insert the right UUID value and valid mount point, and you may use the values for user access rights, encoding etc as they are):
UUID=7258CB9858CB598D /media/win ntfs rw,auto,users,exec,nls=utf8,umask=003,gid=46,uid=1000 0 2
See also: Errata.
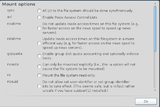
- Now let's set parameters to be used when mounting the partition. Press "Options" and select only the user option (all the others will be "turned on" automatically), and press "ОК".
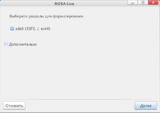
- When disk partitioning is done, press "Next". You will be suggested to format ROSA partition. Let's agree with this and press "Next".
- Installation of the system will be started.
- Now when all packages are installed you should configure the Grub bootloader.
- Now press "Finish".
- Bootloader has been installed successfully. Now the system is installed on your hard drive. Press "Finish".
- After reboot, set a password for root and add a user. Now your ROSA installation is completed.


