Difference between revisions of "How to Install ROSA in VirtualBox"
(Translated from Russian) |
(→Installing VirtualBox in Windows(TM)) |
||
| (10 intermediate revisions by 3 users not shown) | |||
| Line 1: | Line 1: | ||
| + | {{Note|This guide describes installation of ROSA 2012 LTS but most of its parts equally apply to ROSA 2011, with only differences in appearance}} | ||
| + | |||
'''VirtualBox''' is a virtualization solution used to launch operating systems inside virtual machines without a need to install it to real hardware. VirtualBox creates a separate file with hard drive image where operating system can be installed. This image is used by a virtual machine which is actually just one more window in your system but has a full-functional OS inside. | '''VirtualBox''' is a virtualization solution used to launch operating systems inside virtual machines without a need to install it to real hardware. VirtualBox creates a separate file with hard drive image where operating system can be installed. This image is used by a virtual machine which is actually just one more window in your system but has a full-functional OS inside. | ||
| Line 4: | Line 6: | ||
<gallery perrow=2 widths="160px" heights="160px"> | <gallery perrow=2 widths="160px" heights="160px"> | ||
File:Vb0.png|VirtualBox site | File:Vb0.png|VirtualBox site | ||
| − | File: | + | File:ROSA_Vb1_en.png|VirtualBox main window |
</gallery> | </gallery> | ||
| Line 10: | Line 12: | ||
In order to install VirtualBox in Windows(TM), one should go to [http://www.virtualbox.org VirtualBox.org] official site and choose a version of the product suitable for your OS version and hardware platform. You will be provided with a wizard which will help to install VirtualBox on your machine. | In order to install VirtualBox in Windows(TM), one should go to [http://www.virtualbox.org VirtualBox.org] official site and choose a version of the product suitable for your OS version and hardware platform. You will be provided with a wizard which will help to install VirtualBox on your machine. | ||
| − | + | 1. After installation, launch the VirtualBox application. In order to install ROSA, you will need to create a virtual machine first. This can be done using the {{Menu|"Machine" - "New..."}} menu entry. VirtualBox will provide you with a step-by-step wizard with a lot of hints. The wizard is very intuitive, so we will not describe it here. After the machine is created, it will be displayed in the list of machines at the left side of the VirtualBox window. | |
| − | [[File: | + | [[File:ROSA_VB_New_en.png|160px|thumb|center]] |
| − | + | 2. The next step is to setup system settings. Select your machine and then click '''"Settings..."'''. Go to the {{Menu|"System"}} section. Here you should set the settings suitable for you purposes. If in doubt, you can read hints displayed at the bottow of the window. | |
<gallery perrow=2 widths="160px" heights="160px"> | <gallery perrow=2 widths="160px" heights="160px"> | ||
| − | File: | + | File:ROSA_VB2_en.png| |
| − | File: | + | File:ROSA_VB3_en.png| |
| − | </gallery> | + | </gallery> |
| − | + | ||
| + | Note that if you are going to install the 32-bit ROSA in VirtualBox, '''make sure you have PAE enabled''' in the settings of the virtual machine (see {{Menu|"System"}} - "Processor" - "Enable PAE/NX"). | ||
| + | <gallery widths="160px" heights="160px">File:Vbox-pae-eng.png</gallery> | ||
| + | |||
| + | 3. Now go to the {{Menu|"Storage"}} section in the Settings window. Select {{Menu|"IDE Controller"}}, click on the CD image, press {{Menu|"Choose disk"}} and choose ROSA ISO-image. Press "ОК" and return to the main window. Now you can press "Start" to launch your virtual machine. The machine will boot from ISO image and ROSA installation will begin. | ||
<gallery perrow=2 widths="160px" heights="160px"> | <gallery perrow=2 widths="160px" heights="160px"> | ||
| − | File: | + | File:ROSA_VB4_en.png| |
| − | File: | + | File:ROSA_Remove_Disk_en.png| |
</gallery> | </gallery> | ||
| Line 30: | Line 36: | ||
# In the next wibndow you should setup disk partitions, but since we are installing OS to a clear virtual machine, let's use what the wizard suggests and just press {{Menu|"Next"}}. | # In the next wibndow you should setup disk partitions, but since we are installing OS to a clear virtual machine, let's use what the wizard suggests and just press {{Menu|"Next"}}. | ||
<gallery perrow=4 widths="160px" heights="160px"> | <gallery perrow=4 widths="160px" heights="160px"> | ||
| − | File: | + | File:ROSA_VB01_en.png|Start... |
File:Ddd1.png|Loading... | File:Ddd1.png|Loading... | ||
</gallery> | </gallery> | ||
| Line 38: | Line 44: | ||
# The next step is to setup the Grub loader. Leave all parameters 'as is' and press {{Menu|"Next"}}. | # The next step is to setup the Grub loader. Leave all parameters 'as is' and press {{Menu|"Next"}}. | ||
| − | {{ | + | {{Note|Please ensure that Grub is installed to the ''ATA VBOX'' and not to your physical drive! To do this, check that the "Boot device" is set to a proper value.}} |
<gallery perrow=4 widths="160px" heights="160px"> | <gallery perrow=4 widths="160px" heights="160px"> | ||
| − | File: | + | File:ROSA_Lang_en.png|Launching installation |
| − | File: | + | File:ROSA_Diskdrake_en.png|Partition hard drive |
| − | File: | + | File:ROSA_Warning_en.png|Warning |
| − | File: | + | File:ROSA_Format_partitions_en.png|Which partitions should be formatted |
| − | File: | + | File:ROSA_Formatting_en.png|Formatting |
| − | File: | + | File:ROSA_Preparing_installation_en.png|Preparing for package installation |
</gallery> | </gallery> | ||
# In the next two windows just press "Finish" without changing anything. This will finish the installation; ROSA is now installed and ready to be launched. | # In the next two windows just press "Finish" without changing anything. This will finish the installation; ROSA is now installed and ready to be launched. | ||
<gallery perrow=4 widths="160px" heights="160px"> | <gallery perrow=4 widths="160px" heights="160px"> | ||
| − | File: | + | File:ROSA_Installing_en.png|Unpacking ROSA packages |
| − | File: | + | File:ROSA_Bootloader_en.png|GRUB Setup window |
| − | + | File:ROSA_Bootloader_menu_en.png|Last step of the installation | |
| − | File: | + | File:ROSA_Finish_en.png| |
| − | File: | + | |
</gallery> | </gallery> | ||
{{Note|"Congratulations! If you reach this point, the system is installed and ready to be launched!"}} | {{Note|"Congratulations! If you reach this point, the system is installed and ready to be launched!"}} | ||
| − | |||
== Launching ROSA in VirtualBox == | == Launching ROSA in VirtualBox == | ||
*To launch the recently installed system, return to the VirtualBox main menu and edit settings of your virtual machine. In the {{Menu|"Storage"}} section choose your ROSA image, click on the CD picture in the Attributes and choose {{Menu|"Remove disk from virtual drive"}}. | *To launch the recently installed system, return to the VirtualBox main menu and edit settings of your virtual machine. In the {{Menu|"Storage"}} section choose your ROSA image, click on the CD picture in the Attributes and choose {{Menu|"Remove disk from virtual drive"}}. | ||
| − | [[File: | + | [[File:ROSA_Remove_Disk_en.png|160px|thumb|center]] |
| − | *Return to the VirtualBox main menu and press "Start". The virtual machine will be launched and you will see the Grub Loader menu. Choose the entry corresponding to your ROSA installation (normally, it should be highlighted by default) | + | *Return to the VirtualBox main menu and press "Start". The virtual machine will be launched and you will see the Grub Loader menu. Choose the entry corresponding to your ROSA installation (normally, it should be highlighted by default). |
<gallery perrow=4 widths="160px" heights="160px"> | <gallery perrow=4 widths="160px" heights="160px"> | ||
| − | File: | + | File:ROSA_VB01_en.png| |
| − | File: | + | File:ROSA_Launch_en.png| |
| − | + | ||
</gallery> | </gallery> | ||
* Then you will be asked for the '''root''' password, and provided with a dialog to add a user to the system. | * Then you will be asked for the '''root''' password, and provided with a dialog to add a user to the system. | ||
<gallery perrow=4 widths="160px" heights="160px"> | <gallery perrow=4 widths="160px" heights="160px"> | ||
| − | File: | + | File:ROSA_root_passwd_en.png| |
| − | File: | + | File:ROSA_user_en.png| |
| − | + | ||
</gallery> | </gallery> | ||
* In the Login screen, enter the password for user you have recently created | * In the Login screen, enter the password for user you have recently created | ||
<gallery perrow=4 widths="160px" heights="160px"> | <gallery perrow=4 widths="160px" heights="160px"> | ||
| − | File: | + | File:ROSA_login_en.png| |
| − | File: | + | File:ROSA_Ready_en.png| |
</gallery> | </gallery> | ||
* Now ROSA is configured and ready to be launched in VirtualBox. | * Now ROSA is configured and ready to be launched in VirtualBox. | ||
| + | [[ru:Установка ROSA Desktop в VirtualBox]] | ||
[[Category:Documentation]] | [[Category:Documentation]] | ||
Latest revision as of 14:53, 28 August 2016
This guide describes installation of ROSA 2012 LTS but most of its parts equally apply to ROSA 2011, with only differences in appearance
VirtualBox is a virtualization solution used to launch operating systems inside virtual machines without a need to install it to real hardware. VirtualBox creates a separate file with hard drive image where operating system can be installed. This image is used by a virtual machine which is actually just one more window in your system but has a full-functional OS inside.
VirtualBox is convenient when it is necessary to often switch between different OSes (for example, when testing behavior of some application in different distributions). One should note that virtualization consumes significant resources, and you need sufficient RAM to launch virtual machines without significant performance drop.
Installing VirtualBox in Windows(TM)
In order to install VirtualBox in Windows(TM), one should go to VirtualBox.org official site and choose a version of the product suitable for your OS version and hardware platform. You will be provided with a wizard which will help to install VirtualBox on your machine.
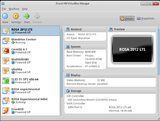
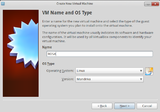
1. After installation, launch the VirtualBox application. In order to install ROSA, you will need to create a virtual machine first. This can be done using the "Machine" - "New..." menu entry. VirtualBox will provide you with a step-by-step wizard with a lot of hints. The wizard is very intuitive, so we will not describe it here. After the machine is created, it will be displayed in the list of machines at the left side of the VirtualBox window.
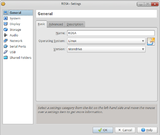
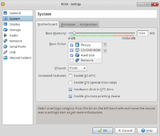
2. The next step is to setup system settings. Select your machine and then click "Settings...". Go to the "System" section. Here you should set the settings suitable for you purposes. If in doubt, you can read hints displayed at the bottow of the window.
Note that if you are going to install the 32-bit ROSA in VirtualBox, make sure you have PAE enabled in the settings of the virtual machine (see "System" - "Processor" - "Enable PAE/NX").
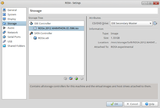
3. Now go to the "Storage" section in the Settings window. Select "IDE Controller", click on the CD image, press "Choose disk" and choose ROSA ISO-image. Press "ОК" and return to the main window. Now you can press "Start" to launch your virtual machine. The machine will boot from ISO image and ROSA installation will begin.
Installing ROSA in VirtualBox
So now you can select your virtual machine and press "Start" in the top part of the VirtualBox window. Since we are installing ROSA to a virtual machine, it is safe to leave default values for most of parameters asked during installation.
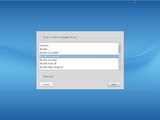
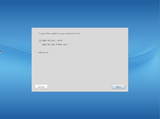
- After launching from CD, you should choose the 'Install System' entry. The installation wizard will appear.
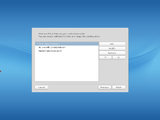
- In the next wibndow you should setup disk partitions, but since we are installing OS to a clear virtual machine, let's use what the wizard suggests and just press "Next".
- In the subsequent two windows you can just press "Next", as well.
- After that, installation of packages will be started. This can take some time.
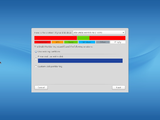
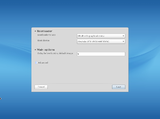
- The next step is to setup the Grub loader. Leave all parameters 'as is' and press "Next".
Please ensure that Grub is installed to the ATA VBOX and not to your physical drive! To do this, check that the "Boot device" is set to a proper value.
- In the next two windows just press "Finish" without changing anything. This will finish the installation; ROSA is now installed and ready to be launched.
Launching ROSA in VirtualBox
- To launch the recently installed system, return to the VirtualBox main menu and edit settings of your virtual machine. In the "Storage" section choose your ROSA image, click on the CD picture in the Attributes and choose "Remove disk from virtual drive".
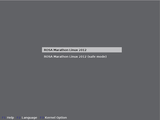
- Return to the VirtualBox main menu and press "Start". The virtual machine will be launched and you will see the Grub Loader menu. Choose the entry corresponding to your ROSA installation (normally, it should be highlighted by default).
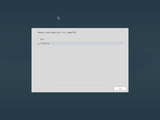
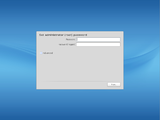
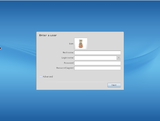
- Then you will be asked for the root password, and provided with a dialog to add a user to the system.
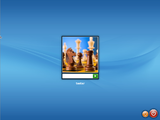
- In the Login screen, enter the password for user you have recently created
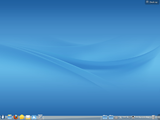
- Now ROSA is configured and ready to be launched in VirtualBox.

